How to Add Emails from Your Own Domain
You can use your own domain to send emails
To get started sending emails from your own domain do the following list of things:
Please note that this article is a little technical and you will need access to your domain directly or your hosting account depending on where the DNS records are located. Please reach out to us if you are not sure.
Please note that this article is a little technical and you will need access to your domain directly or your hosting account depending on where the DNS records are located. Please reach out to us if you are not sure.
1. Click Emails and then Email Settings from the sub menu list that appears.
2. Enter the domain you would like to send emails from
Note: Do not add www to the domain it should be in the format of yourdomain.com.
Note: Do not add www to the domain it should be in the format of yourdomain.com.
3. Click the Save button and the page should refresh and you should have a new section called DNS Record Setup.
4. You will now have a list of 4 new records to add do your DNS at the domain/hosting level.
First we will start with the DKIM record and is required to send emails.
To add the dkim record you will need to go into your domain/host account and add a new "txt" record.
You will then need to copy the name and value fields over. See screenshot below of how to get the name and value.

You will then copy them to DNS of the domain.
Below is a screenshot of what this looks like inside of Cloudflare.
Note: Unfortunately since all domains are registered from different places we can't provide exact instructions but the basic process is always the same and we can try to point you in the right direction if you reach out to us.
Below is a screenshot of what this looks like inside of Cloudflare.
Note: Unfortunately since all domains are registered from different places we can't provide exact instructions but the basic process is always the same and we can try to point you in the right direction if you reach out to us.

Once you have done this for the DKIM record you will do the exact same thing for the SPF and DMARC record.
You will create new records for each and the only thing that will change is name and values.
Lastly If you would like Member Pages to handle all of your email for you (meaning all your email is created inside of our system as tickets and you and your staff members can manage everything from with inside of Member Pages) then you can add the MX record as well.
Note the MX record recommended but it optional and only required if you want Member Pages to handle all your emails. If you must use something else for that then you can skip this one.
Note the MX record recommended but it optional and only required if you want Member Pages to handle all your emails. If you must use something else for that then you can skip this one.
Adding the MX record is the same as the other three however instead of TXT record you will select MX record. Also if there is a Priority field you can enter "10" as the value. You must remove any other MX records that may be there when adding this.
Once you have added the records above you can click the Verify Record buttons on each of them. Once you have verified the three records you will be able to add email addresses to which you can send and receive (if you added the mx record) from.
It will look like this image (once you add some emails):
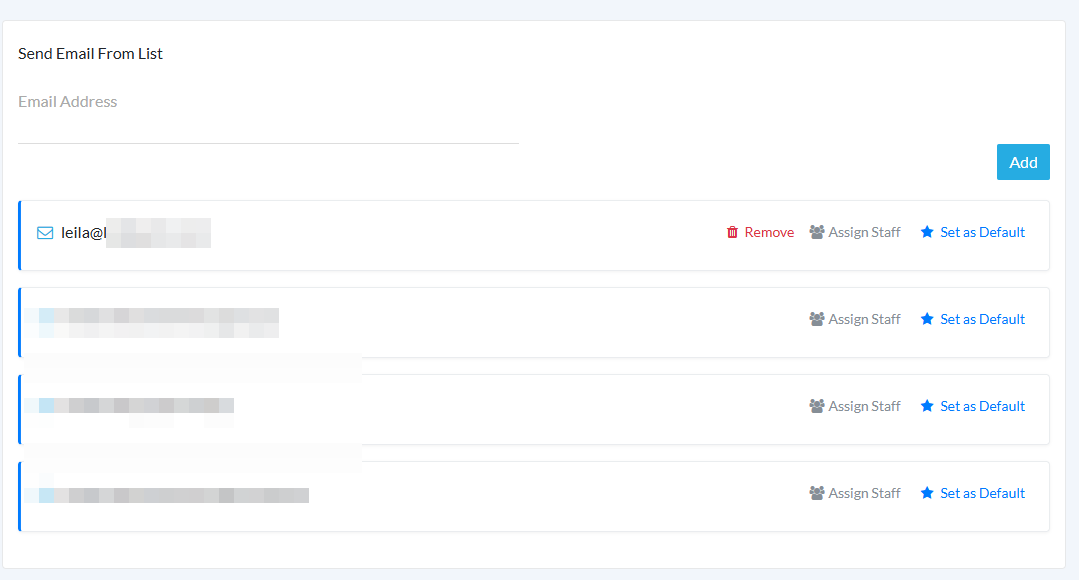
If you would like staff to respond from specific email addresses then you can click on the Assign Staff link to assign those emails to them.